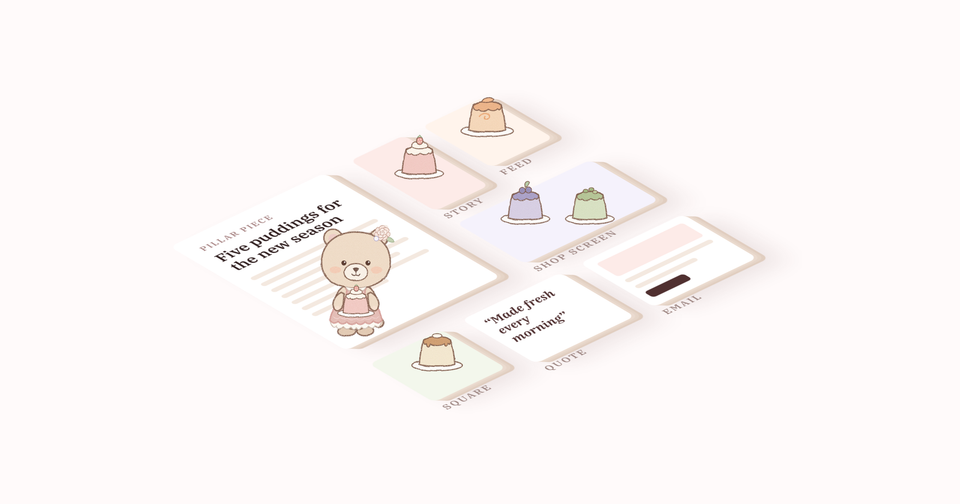
Content amplification with AI: A practical guide for small teams
What I've learnt about turning one pillar piece into many formats, how I set it up in Claude, and what it could produce for a small (made-up) pudding shop.
About five years ago, I might have spent hours writing a long article. Finally, it was finished! But then, I still needed to write a caption, summarise it for another channel and create several other versions...
Marketers call this repurposing: turning one pillar piece, such as a long article, a webinar or a talking-head video, into micro content like quotes, clips, graphics, social posts and emails.
People often use AI for single tasks, like writing a caption or generating an image. But I was curious whether it could reliably scale production.
I started with small AI production experiments, like a workflow for consistent feature images on this blog, built with a ChatGPT Project and reusable instructions.
These days, I use Claude to create pillar pieces and repurpose them, so the writing, video, graphics and checks all draw on the same instructions and facts.
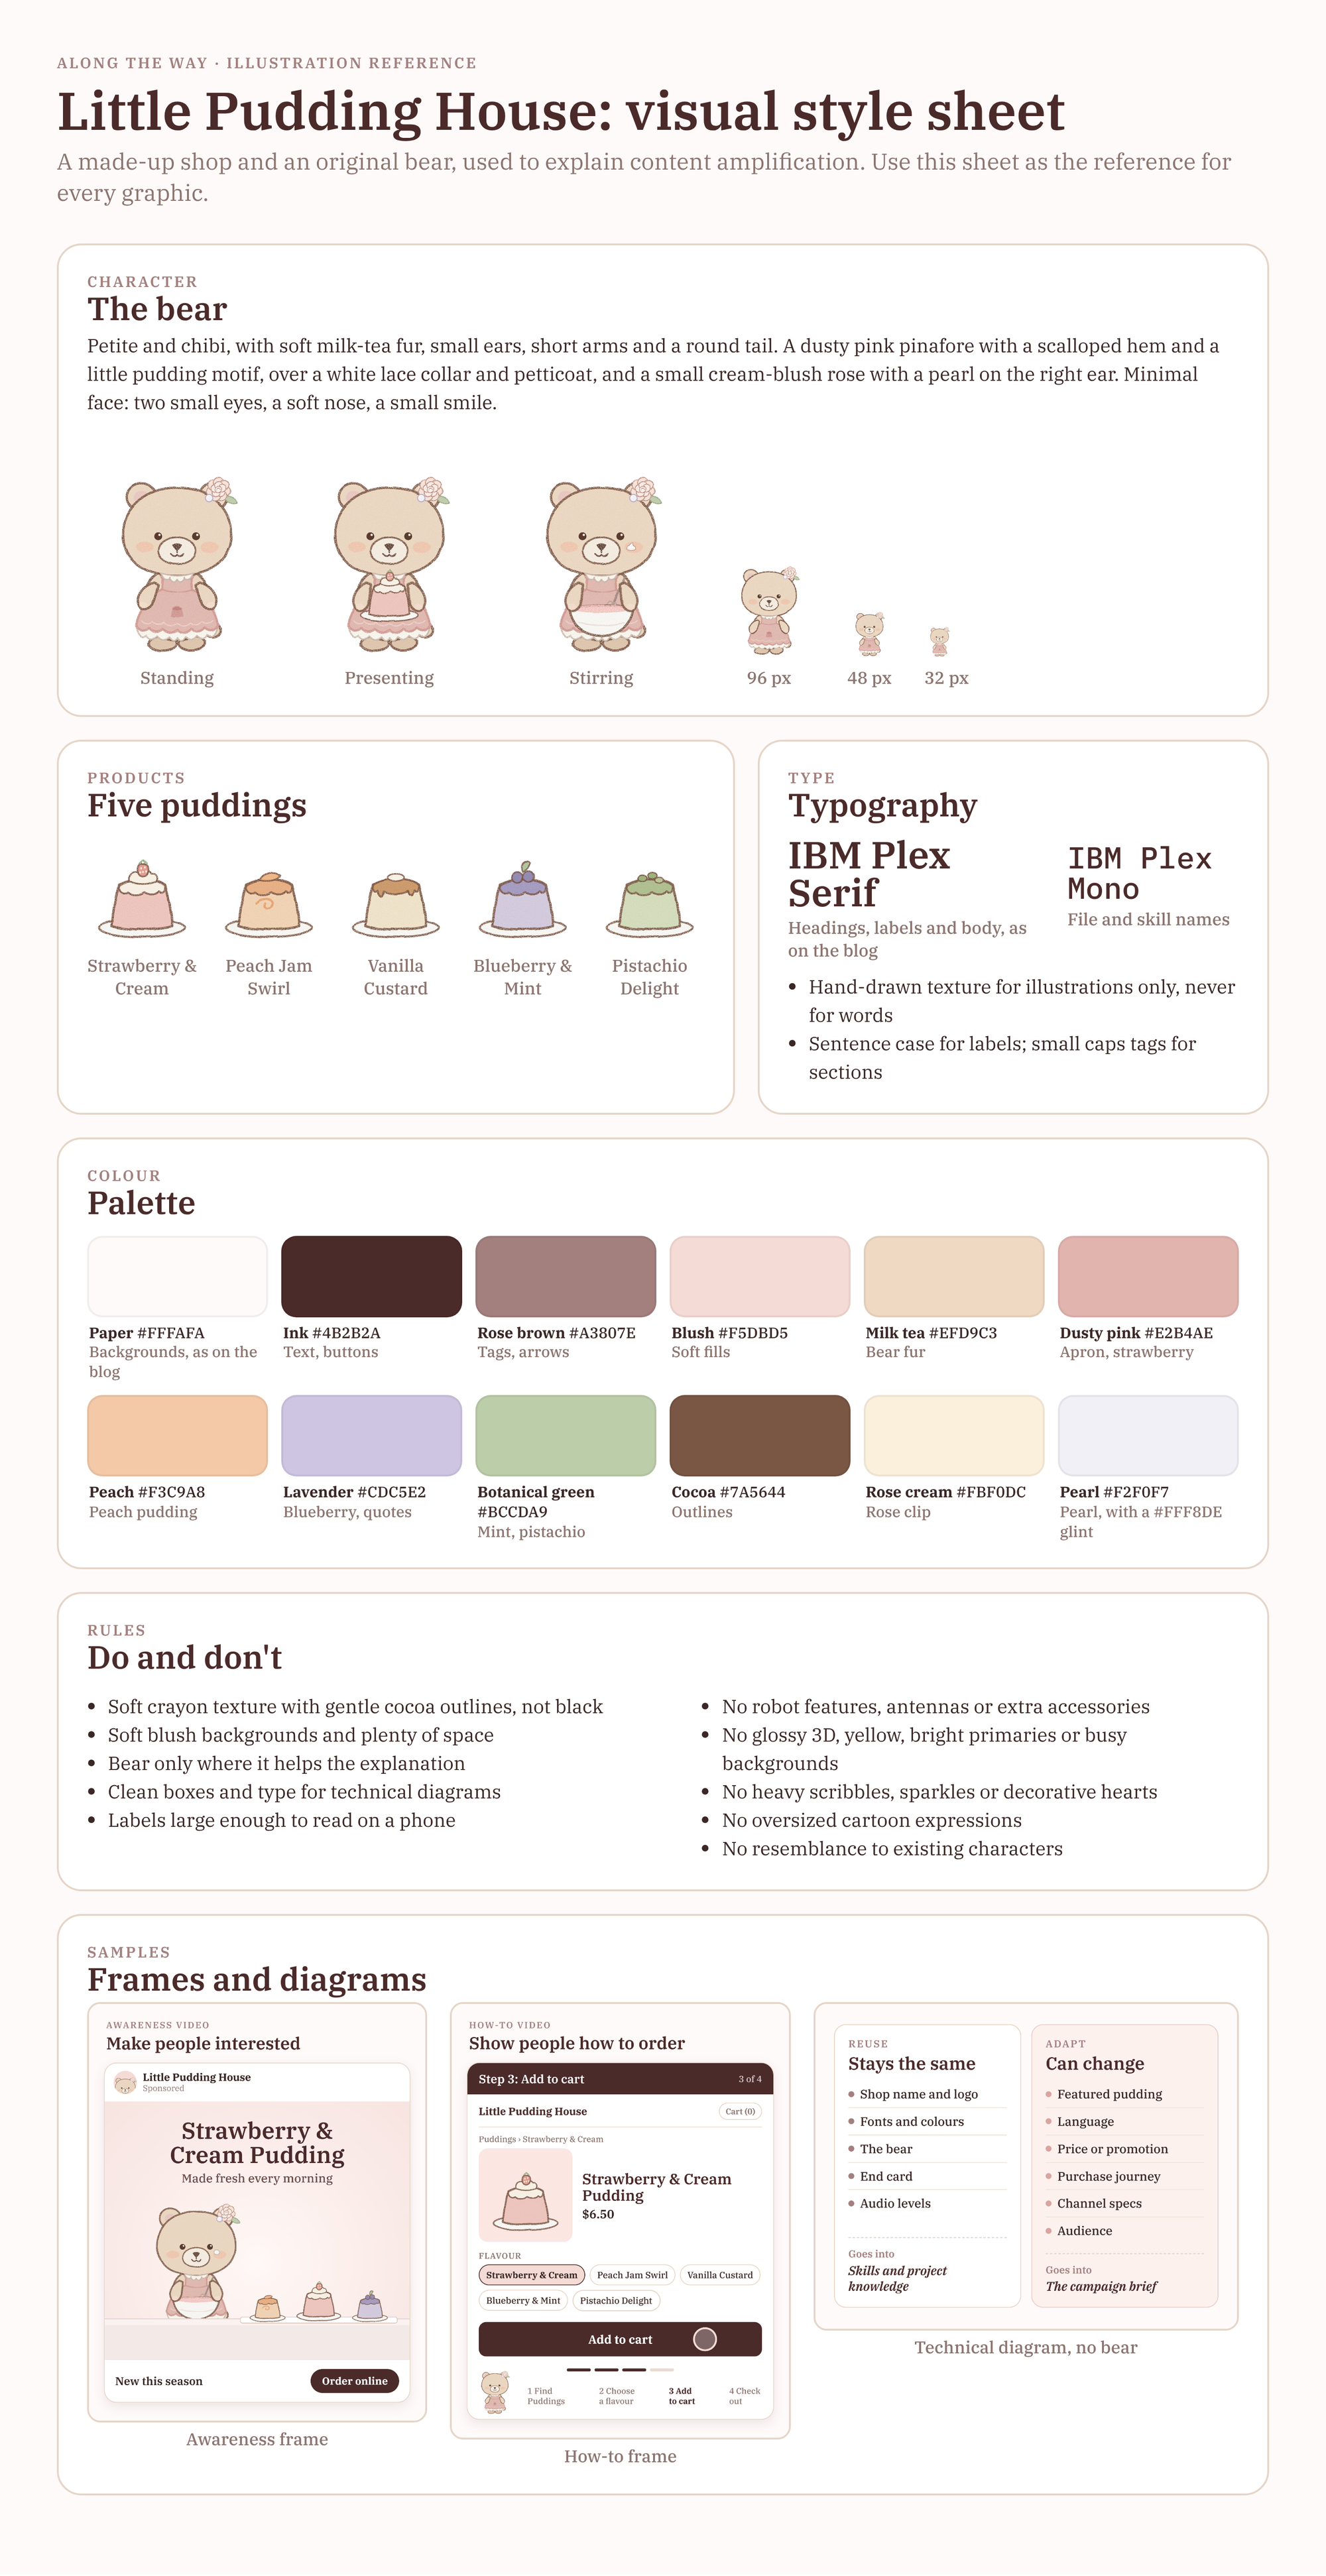
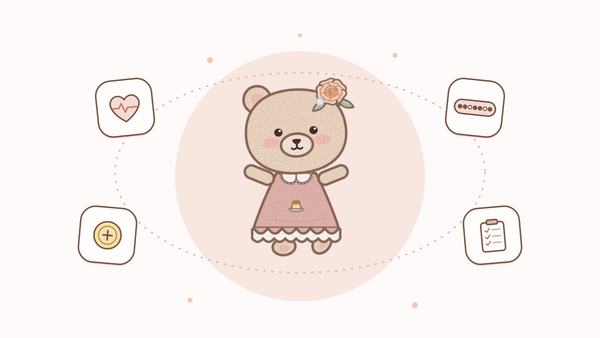
To keep the examples concrete, I'll use a made-up business throughout: Little Pudding House, a small pudding shop run by a little bear.
The graphics are made-up as examples, but this can work with your raw input, such as your own photos or videos of your product.
Part 1: What I've learnt
1. Start with a pillar piece you want to amplify
I've found campaigns easier to plan from one pillar piece.
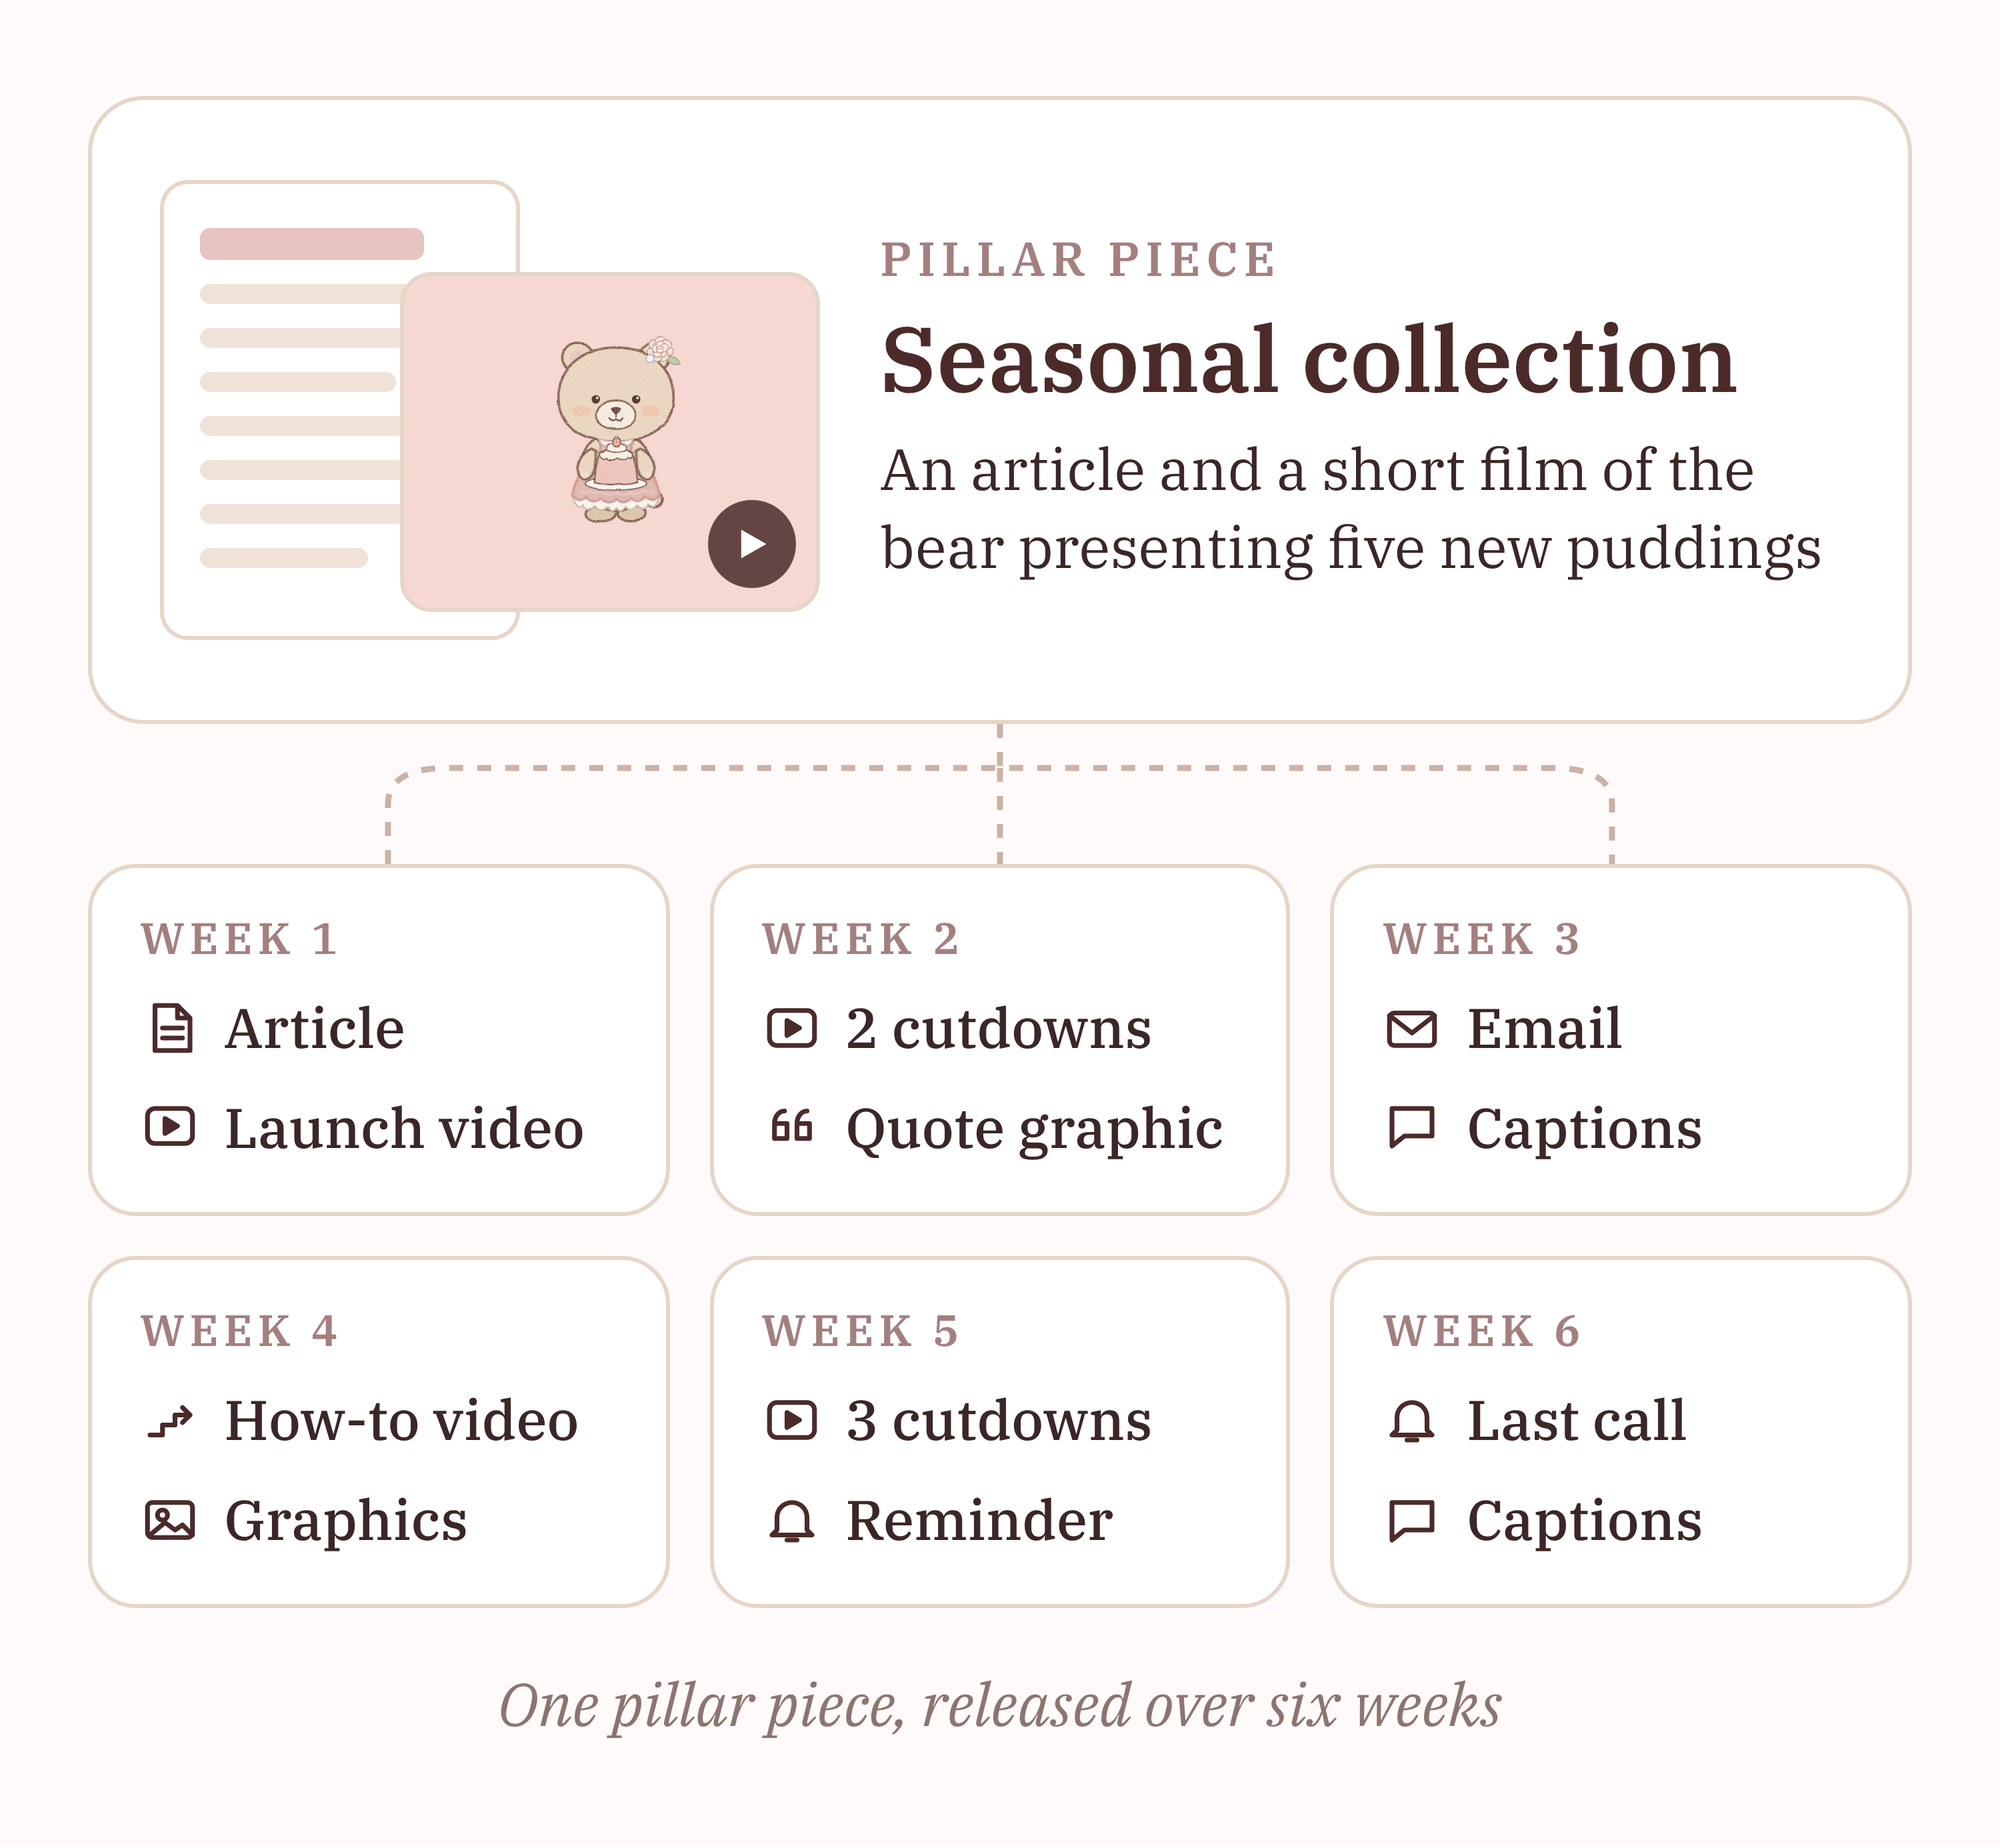
For Little Pudding House, that could be an article introducing the new seasonal puddings, plus a short film of the bear presenting each one.
Everything else branches from the pillar and points back to it, in the familiar hub-and-spoke model. (HubSpot calls the hub a pillar page.)
Knowing what's worth amplifying is the hardest part, and if anyone has the secret recipe, I'd love to read it! This is a complex topic, which I'll wrestle with another time.
Until then, before making every version, I'd publish the main piece. Then the content calendar: a launch, a reminder and a last call is a simple pattern.
2. Give each format one job
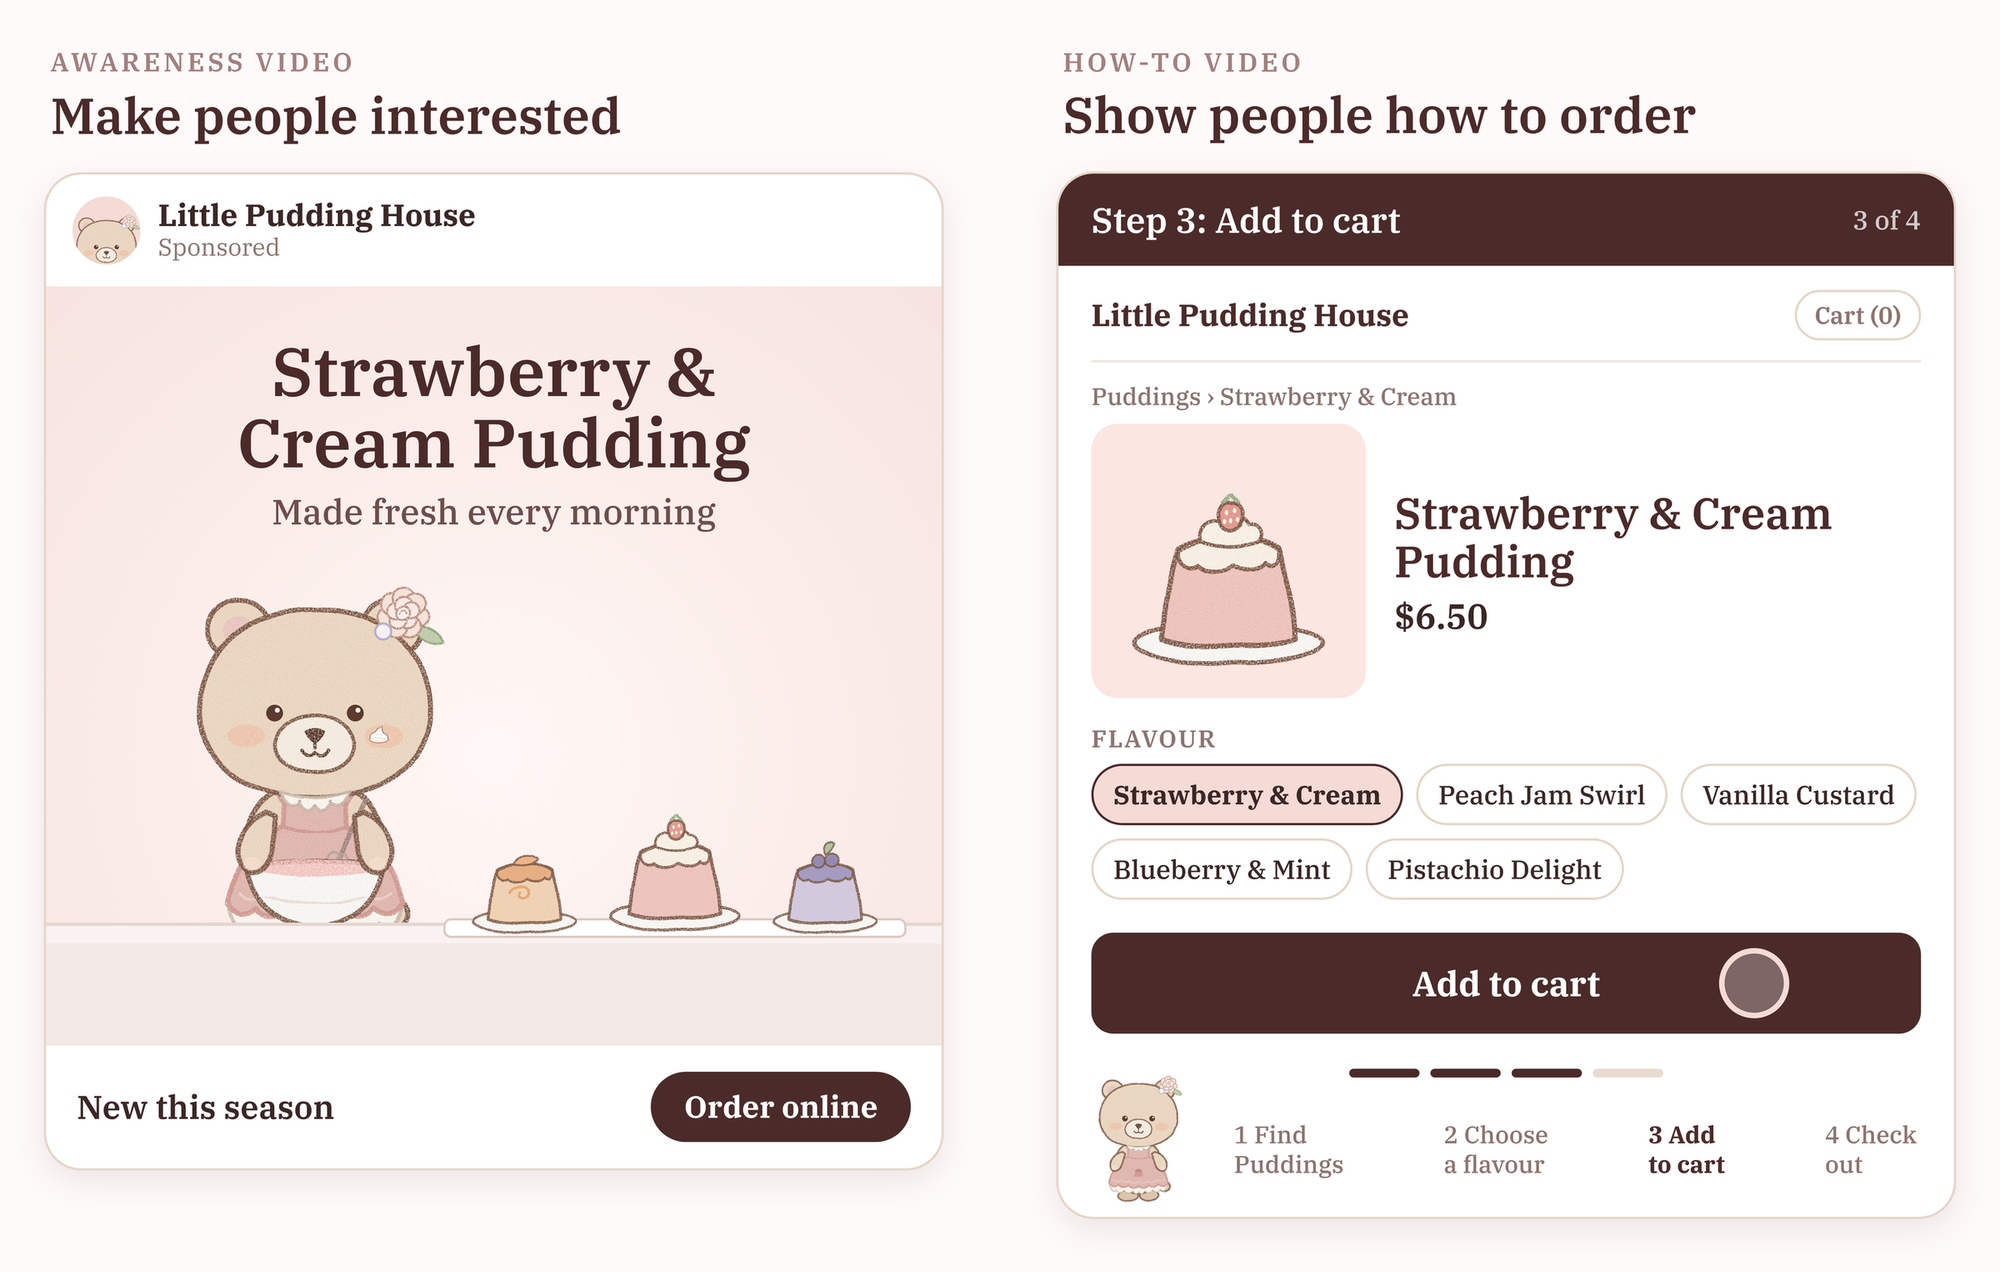
For the pudding shop, there are two jobs: an awareness video that earns attention, and a how-to video that walks people through ordering. It's tempting to make one video do both, but I think it's better to separate them.
3. Building taste can start from simple observations
Much of what I know about making content comes from observing what others do well. When a piece of content works, I think about how its visual cues, pacing, movement, and sound work together to deliver the message.
Colleagues' feedback often shows me what I missed. Sometimes an ad I admire becomes a reference for a skill, too.
Part 2: How to set up Claude Projects and skills
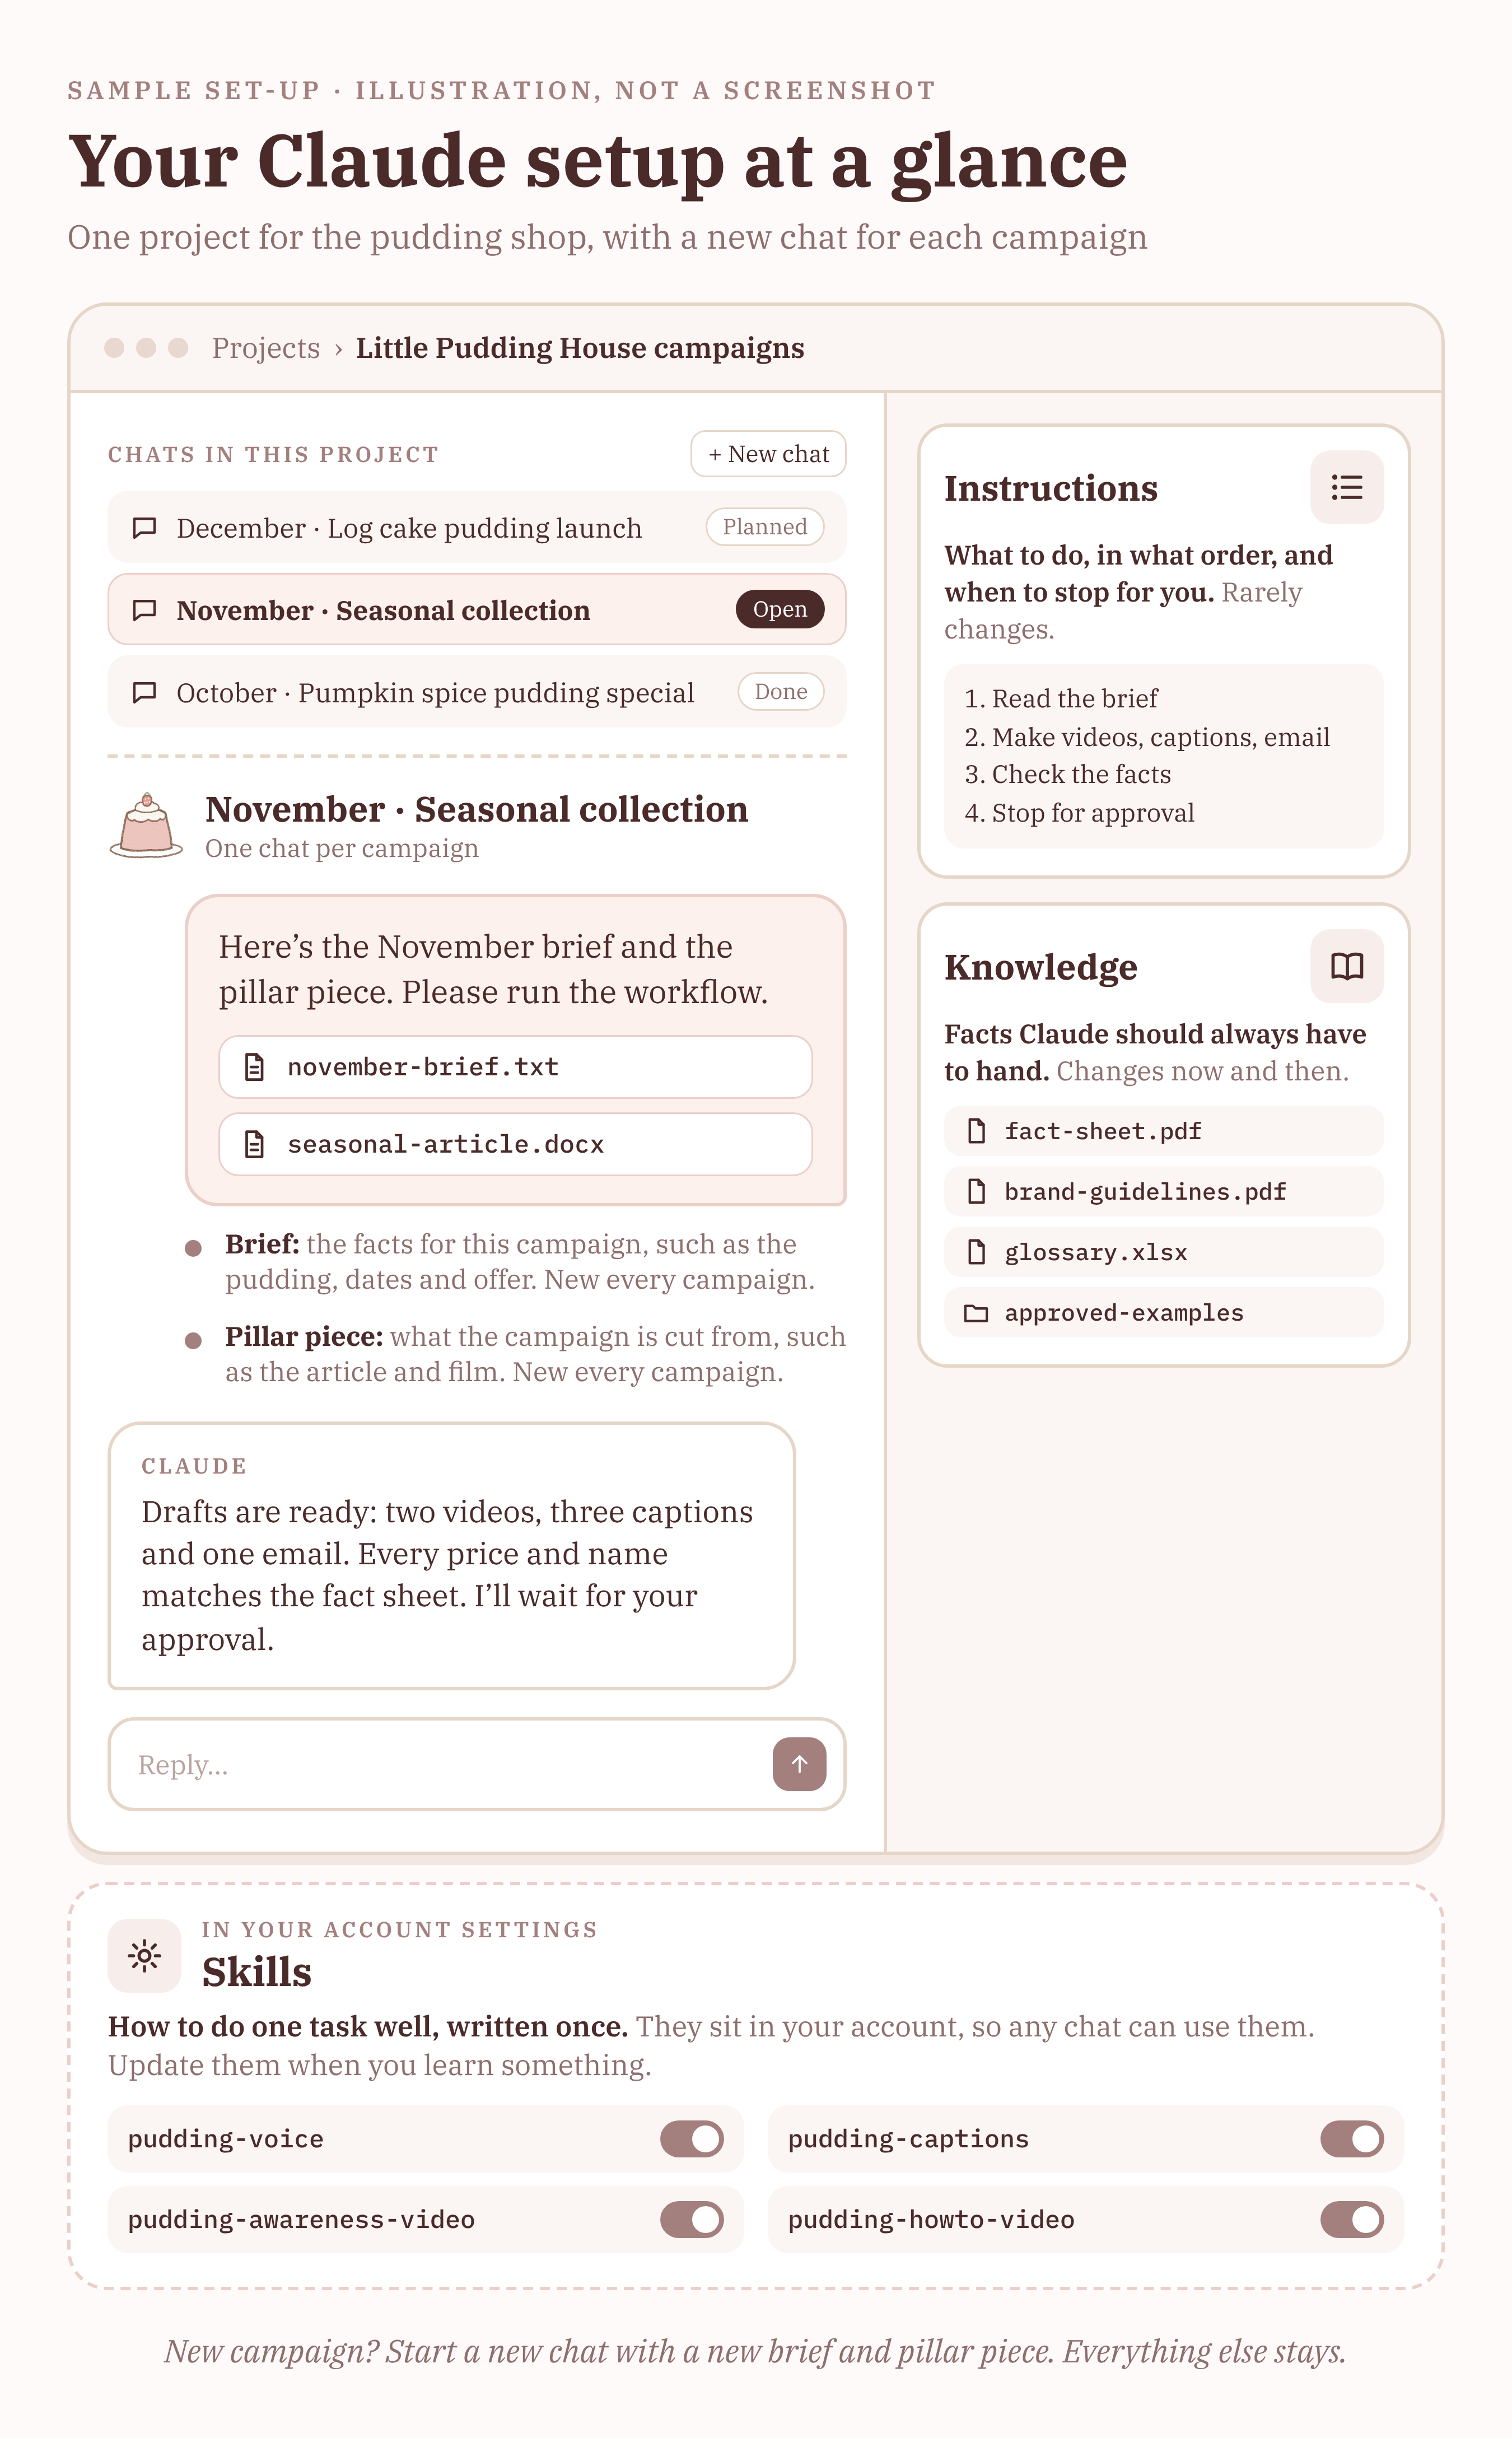
In Claude, I keep the parts that rarely change, like rules and reference files, separate from the parts that change every campaign.
That way, a new campaign only needs a new brief and pillar piece. A Claude Project is a workspace with its own chats, instructions and knowledge.
Step 1: Prepare your material
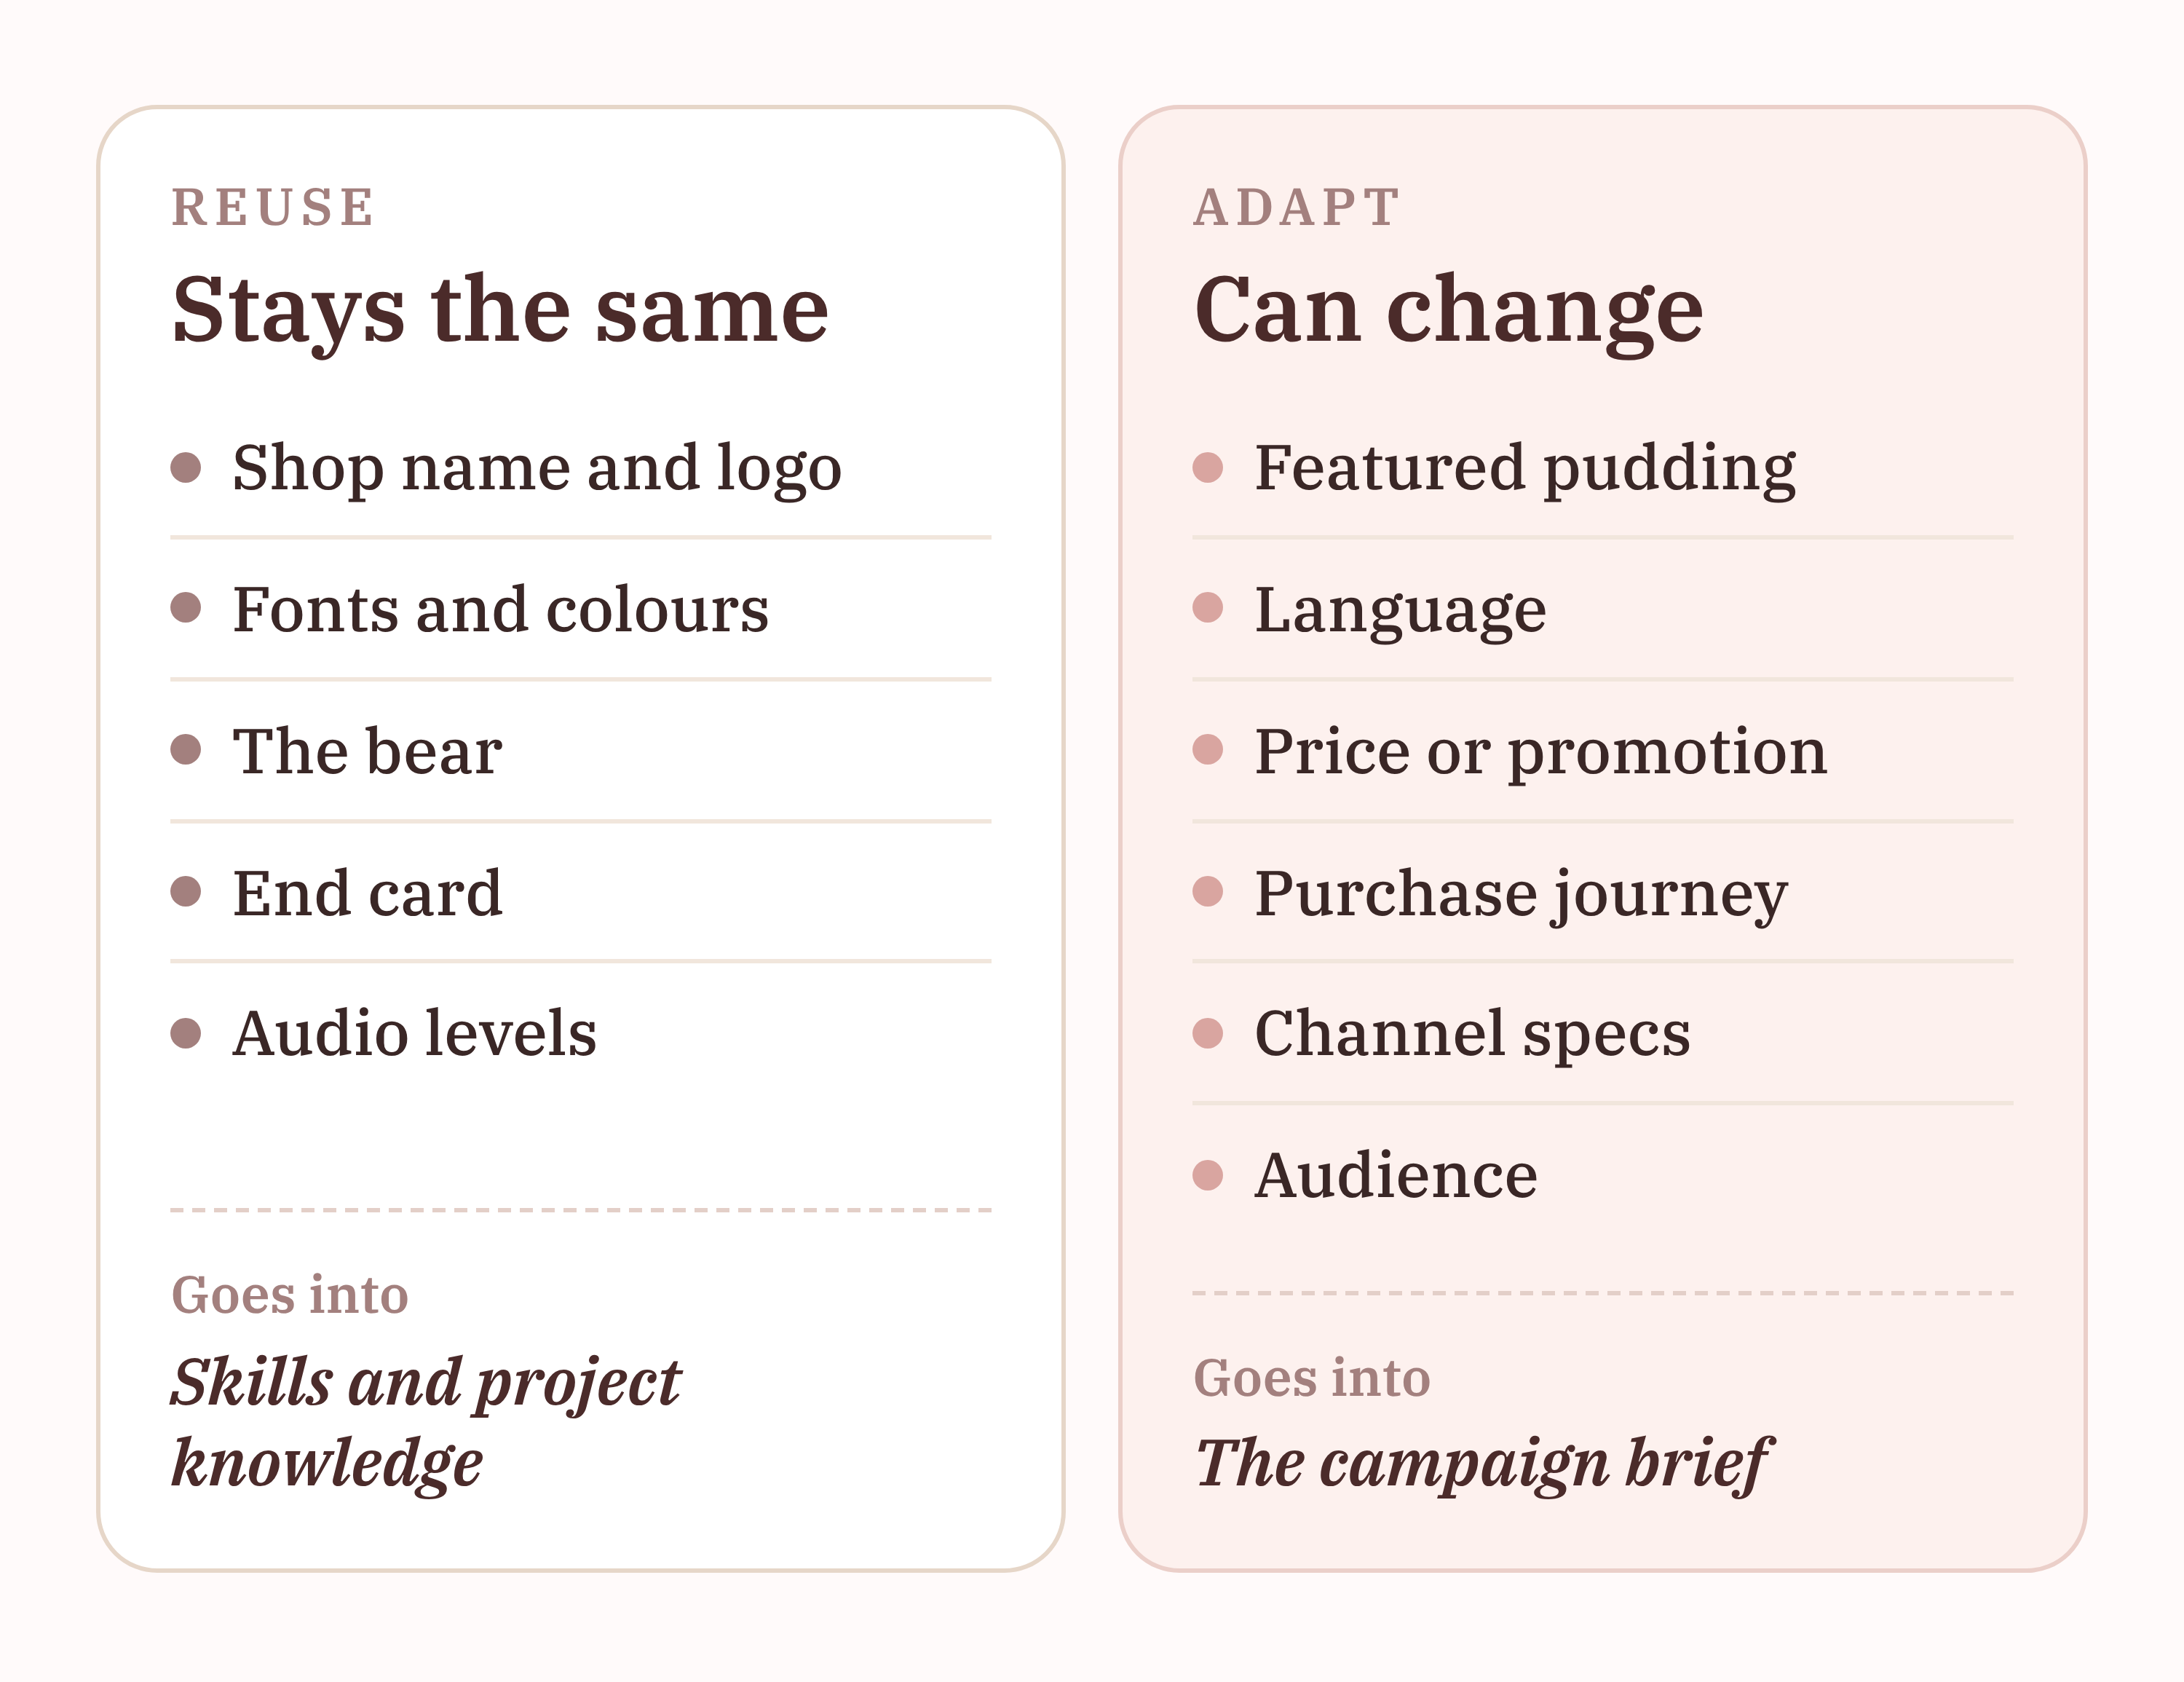
Before you create the Project, sort a campaign's parts into what stays the same and what changes.
- Put what remains the same into skills and project knowledge. (Step 2 covers building skills.)
- Put what changes into each campaign's brief, along with the pillar piece.
When you make many versions, they can start to look identical. Designers usually solve this by fixing the brand elements and letting one thing change, usually the key visual. I learnt most of this from our team's designer, and her feedback became the design rules we used.
For the pudding shop, only the featured pudding changes, so every video is clearly Little Pudding House, but no two look the same.
Beyond that, instructional content usually changes the most, because the steps must match what each customer sees.
With that sorted, gather the material for project knowledge:
- A fact sheet or product catalogue with names, regular prices, ingredients and other details you must get right
- Your brand guidelines: colours, fonts, logo, tone
- A glossary helps
- Two or three approved examples, such as a template you've spent more time refining
Then write down the fixed rules for each format, so anyone can check them. These become your skills in Step 2:
- Give viewers enough time to read and understand each screen, then check the pacing in the finished video
- Show where to start before showing what to tap
- Never show something the product can't do
Keep the pillar piece for your first campaign ready, such as the article and the footage. It goes into the campaign chat with the brief in Step 4.
The quality of this raw input decides the quality of everything made from it. Clear footage and a finished article give Claude far more to work with!
Step 2: Build your Claude skills
Skills are reusable instructions Claude follows for a specific task. A skill might explain how to write social captions, format a product guide or produce a campaign video.
Unlike Projects, skills aren't tied to one workspace. Write one once and use it in any chat or project. Start with the jobs you repeat. I keep separate skills for different outputs because they need different rules.
For the pudding shop, that could mean four skills:
pudding-voice, for the tone and words in anything writtenpudding-awareness-video, for the layout, pacing and sizes of awareness videospudding-howto-video, for showing each ordering step clearlypudding-captions, for social captions (the example below)
What goes into a skill?
Each skill is a folder containing a file called SKILL.md. This starts with a name (up to 64 characters) and a description (up to 200 characters), followed by the instructions.
You can also include examples, reference files and scripts. Claude uses the description to decide when to load the skill, so be specific about the tasks it covers.
Here's a fictional caption skill for the pudding shop:
---
name: pudding-captions
description: Write social captions for Little Pudding House. Use for Instagram, Facebook or LinkedIn posts about our puddings.
---

# Captions

- Start with the pudding name, then one benefit.
- Keep captions short enough to read without tapping "more", so the whole message shows in the feed.
- End with one call to action: "Order online" or "Visit the shop".
- Take every price and ingredient from the fact sheet or brief. Never guess.
Tips for making skills useful
- Be specific about when to use them. Name the tasks and channels in the description so Claude can recognise the right job.
- Include examples. Show what a good output looks like, especially where tone, layout or formatting matters.
- Say why a rule exists. Claude can apply the reason to cases the rule doesn't cover. Anthropic's prompting guide has more on this.
- Keep changing information elsewhere. Put prices, offers, and product details in the campaign brief or project knowledge, not in a reusable skill.
- Keep the brand voice consistent. Put tone in its own skill, like
pudding-voice, and tell Claude in the project instructions to use it for everything written. - Improve them as you go. When a caption works particularly well, or a colleague spots something missing, update the instructions or skills rather than repeating the feedback in every new conversation.
How to add a skill
The easiest way to add a skill is to ask Claude in a chat!
Describe the job and attach examples of how you work, such as your brand guidelines or examples you like and admire.
Claude asks a few questions, then writes the skill for you as a file you can save (Anthropic's guide).
If you'd rather write it yourself, zip the skill folder and upload it in Claude's Skills section.
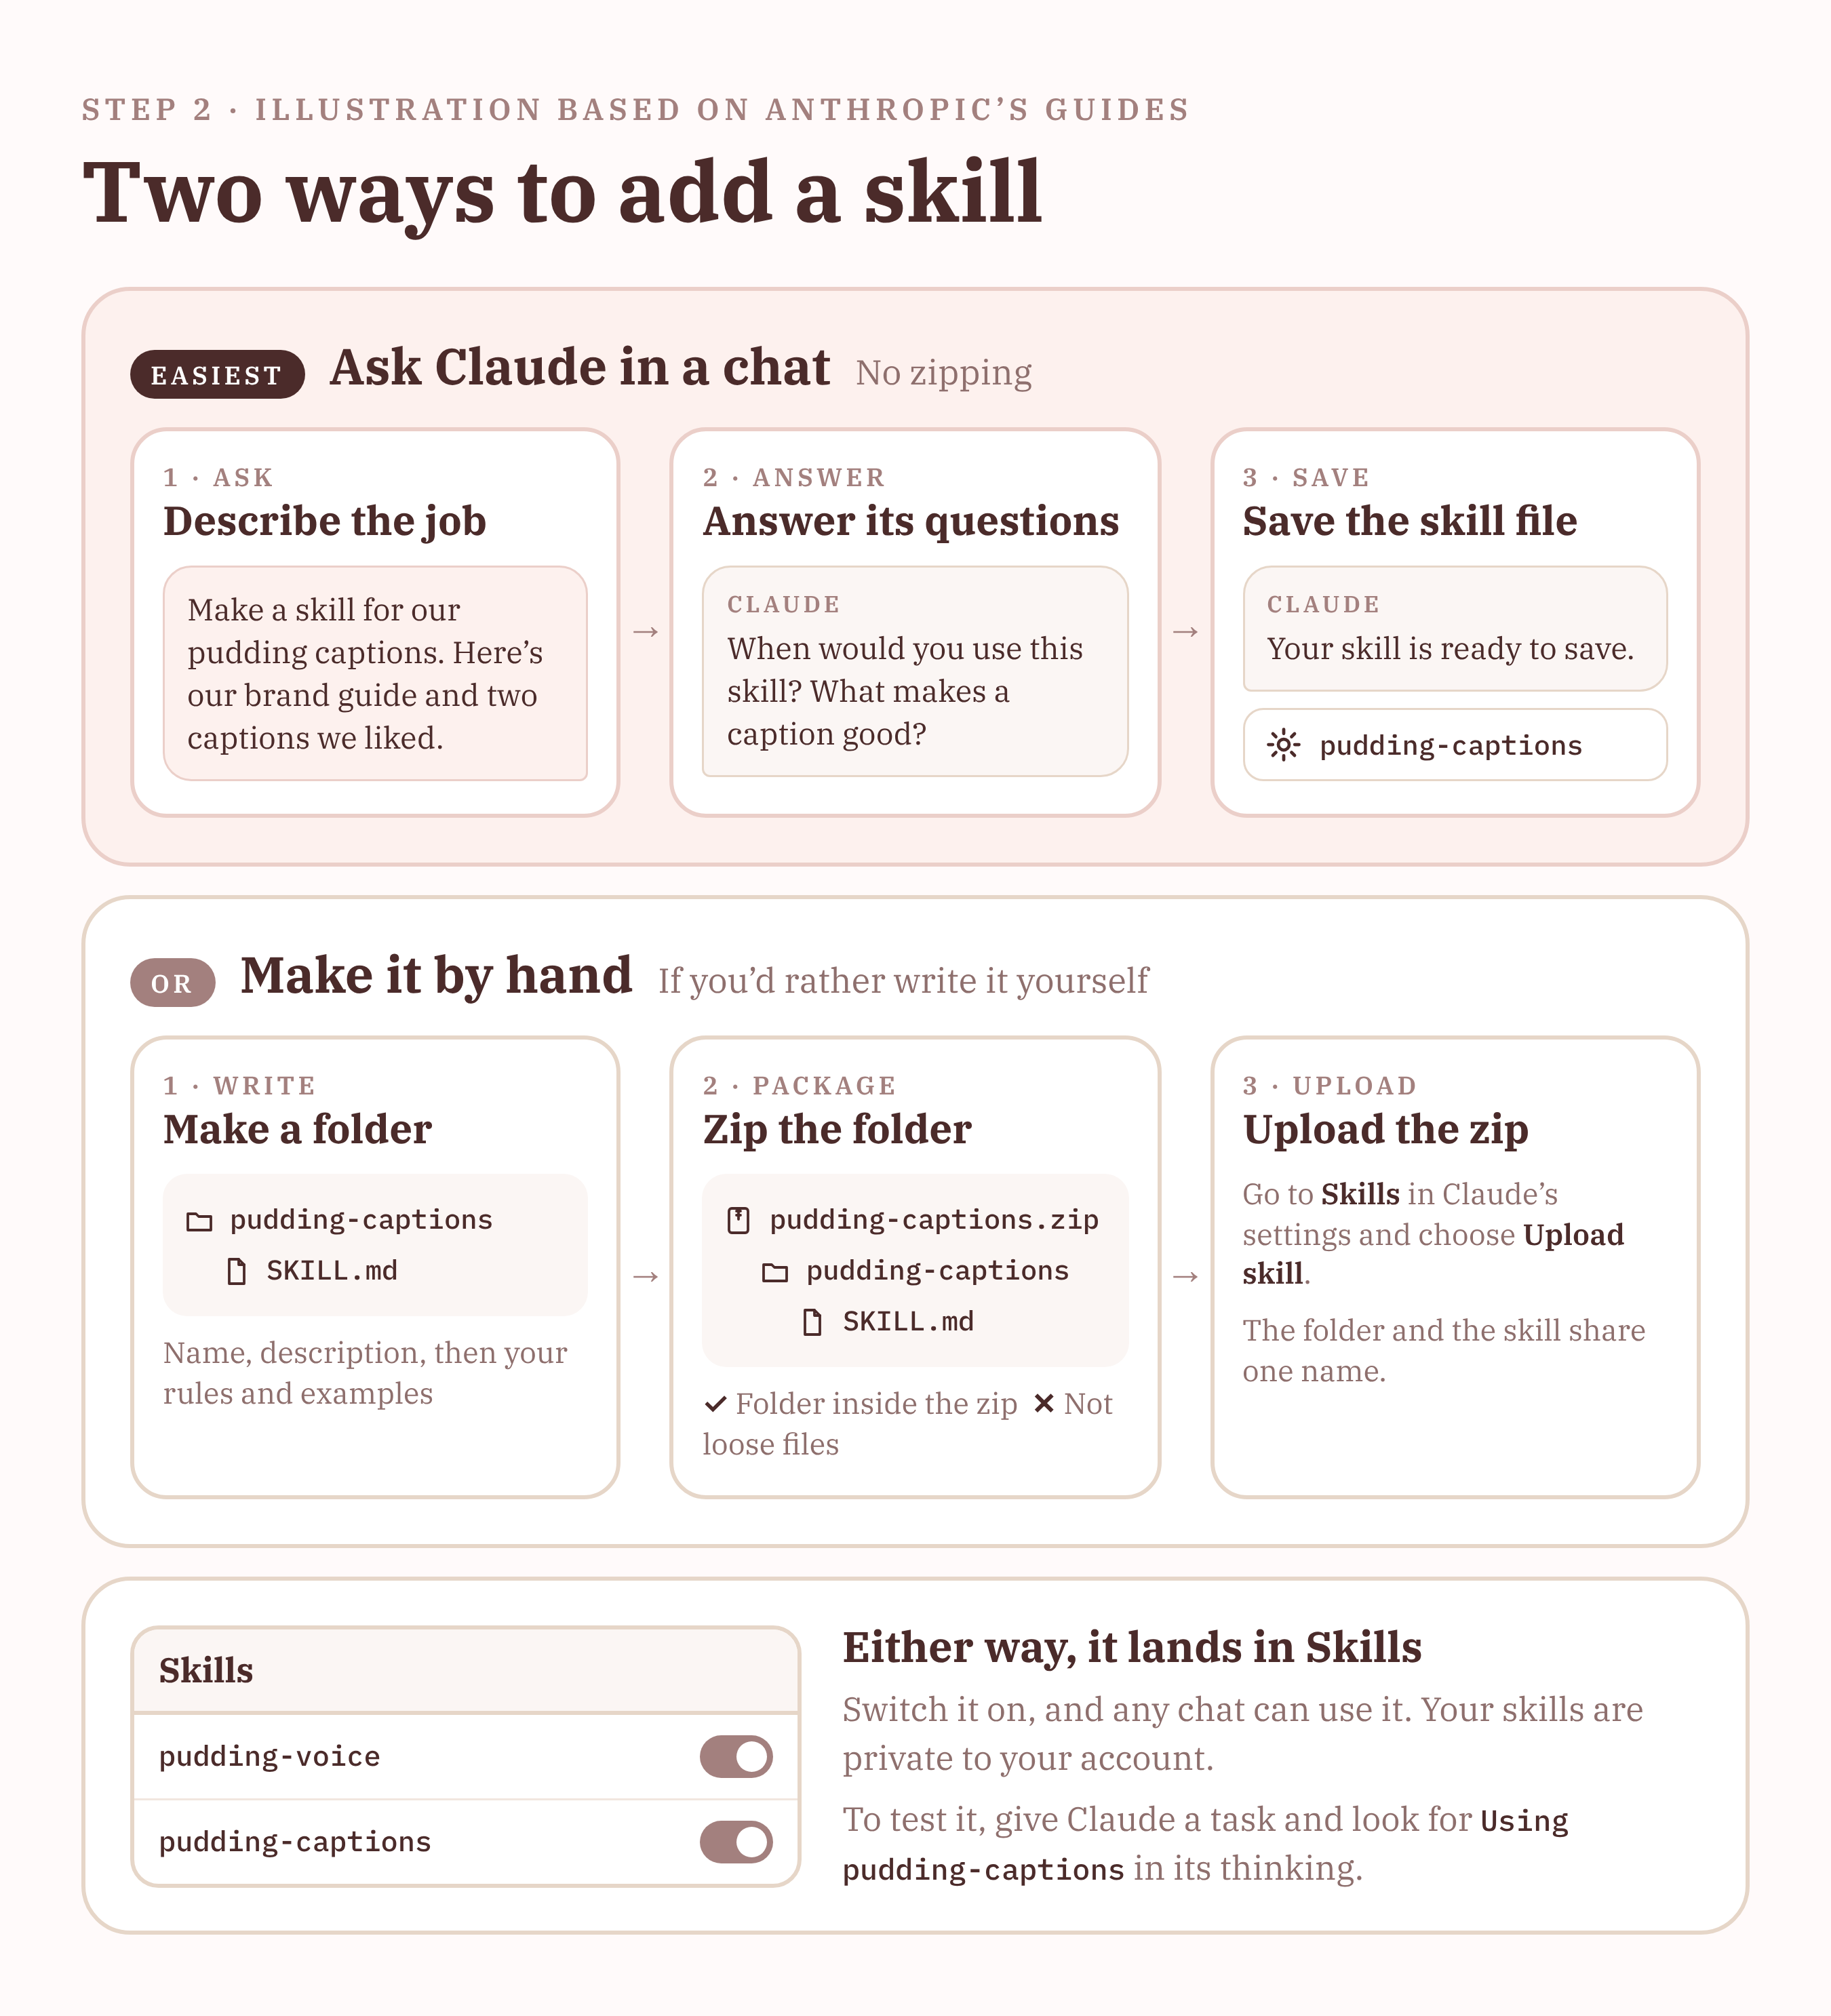
Uploaded skills are private to your account. To share one with teammates, give them the folder so they can upload their own copy.
Projects are available on all Claude plans, including free accounts, with limits. Skills need a paid plan (Pro, Max, Team or Enterprise) and code execution turned on in settings.
Plans change often, so check Anthropic's guides to Projects, using skills and creating custom skills for current details.
Step 3: Create a Claude Project and write its instructions
Create one Project for your campaigns (for example, "Little Pudding House campaigns") and upload the fact sheet, brand guidelines, glossary, and examples to its knowledge.
Then consider using one chat per campaign, so each campaign's brief, drafts and feedback stay together.
The project instructions tell Claude the work order and where to stop. Here's a simple version you can copy and adapt:
You're the content producer for Little Pudding House, a small pudding shop.
Your goal is drafts that make families and people who live alone want to order online.

1. Read the brief and the pillar piece. Ask me about anything missing or unclear before you start.
2. Use pudding-awareness-video and pudding-howto-video to make each video in the sizes listed in the brief.
3. Use pudding-captions for captions. For emails and graphics, follow the brand guidelines and the approved examples.
4. Use pudding-voice for everything written.
5. Check every product name, price and claim against the fact sheet and the brief. List anything that doesn't match.
6. Stop and wait for my approval. Don't treat any draft as final.
Swap in your own skill names.
Step 4: Write a brief and run a small test
A brief shares the facts that change.
Here's a made-up one for the pudding shop:
Campaign: Seasonal collection launch
Featured product: Strawberry & Cream Pudding
Message: Made fresh every morning
Dates: 1 to 30 November
Pillar piece: seasonal collection article and three-minute film
Formats: awareness video (stories, feeds, in-store screen), how-to video (stories), three captions, one email
Audiences: families, people who live alone
Steps to show: website > Puddings > pick a flavour > add to cart > check out
Call to action: Order online
Also include any useful raw materials, such as photos, recordings or background context. The clearer and more complete your inputs, the better the output is likely to be.
For the first run, consider asking for only a few outputs, such as one asset and two captions, so that you can quickly check three things:
- Did Claude follow the project instructions in order?
- Are the facts right, compared with the brief and the fact sheet?
- Was the right skill used? If not, make its description more specific.
In my setup, the video skill uses code to combine recordings, text, and music into video files.
For music, less has worked better for me when composing in Claude.
In the tracks I've tried, a simple piano tune sounded better than a complex arrangement, and anything with more than two elements didn't sound good. The strings came out scary.
Step 5: Review and improve
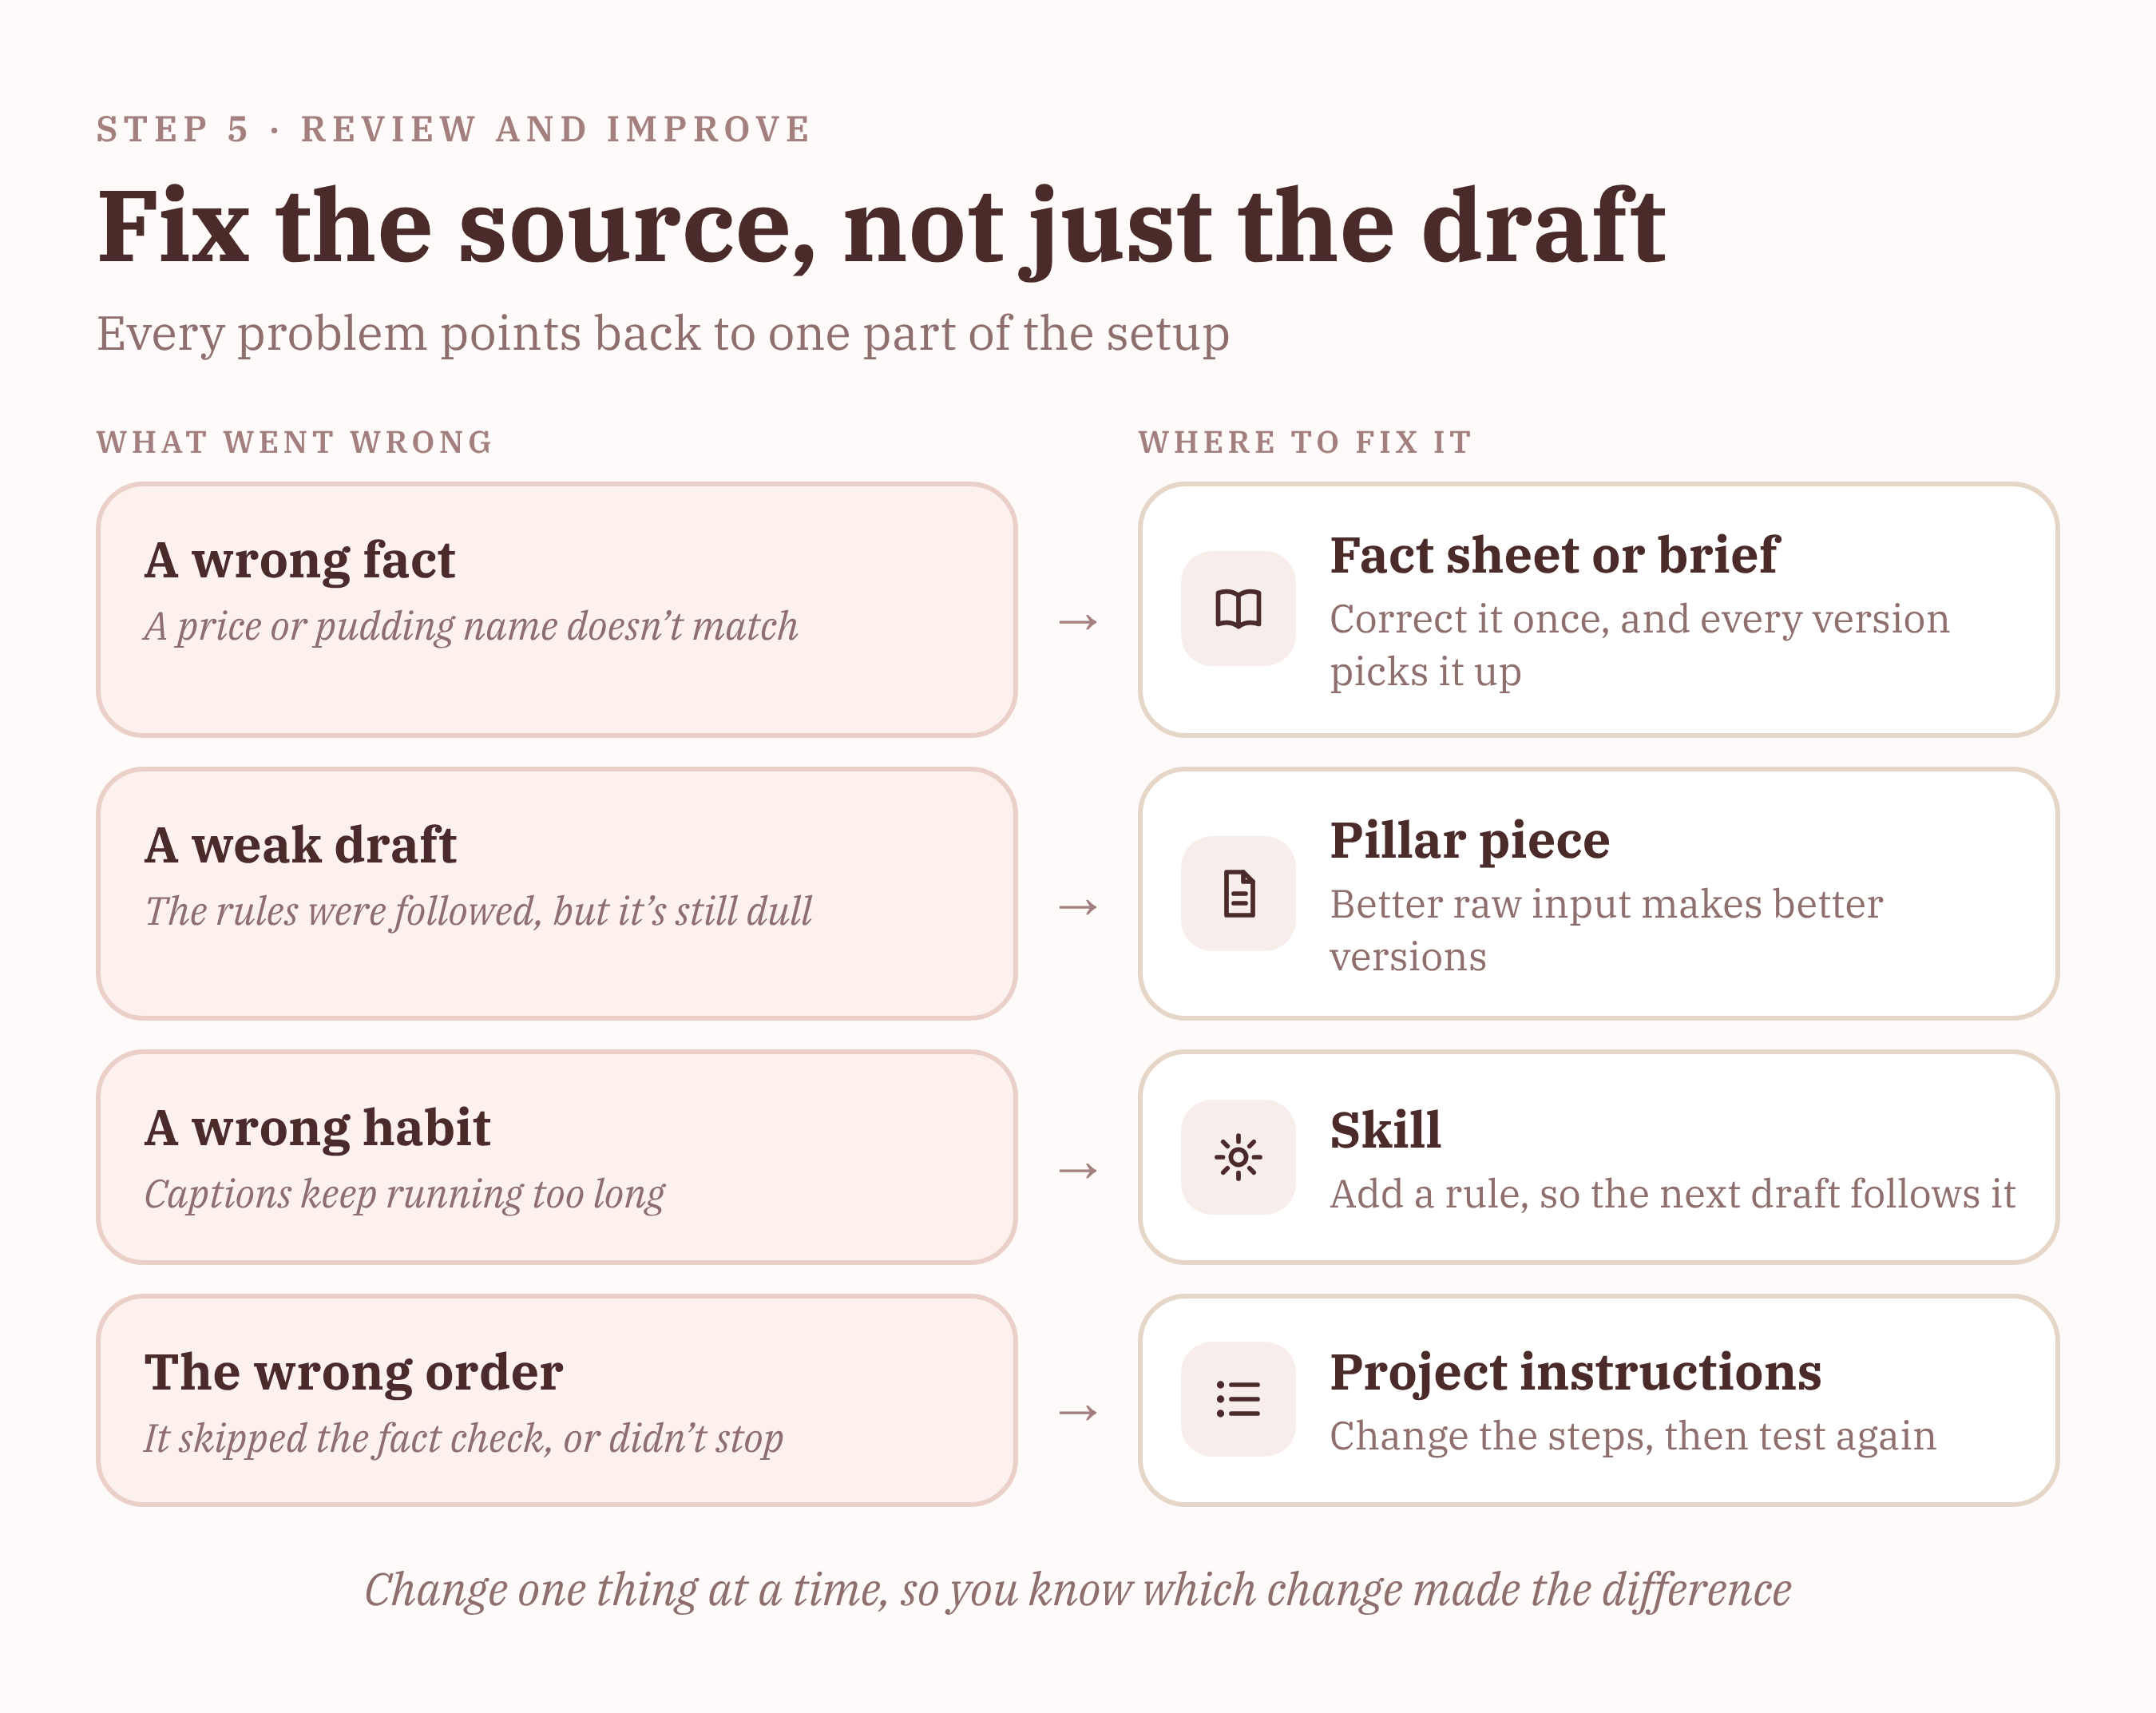
Read every output before approval, and when something is wrong, find where the mistake came from.
Part 3: What one campaign could produce
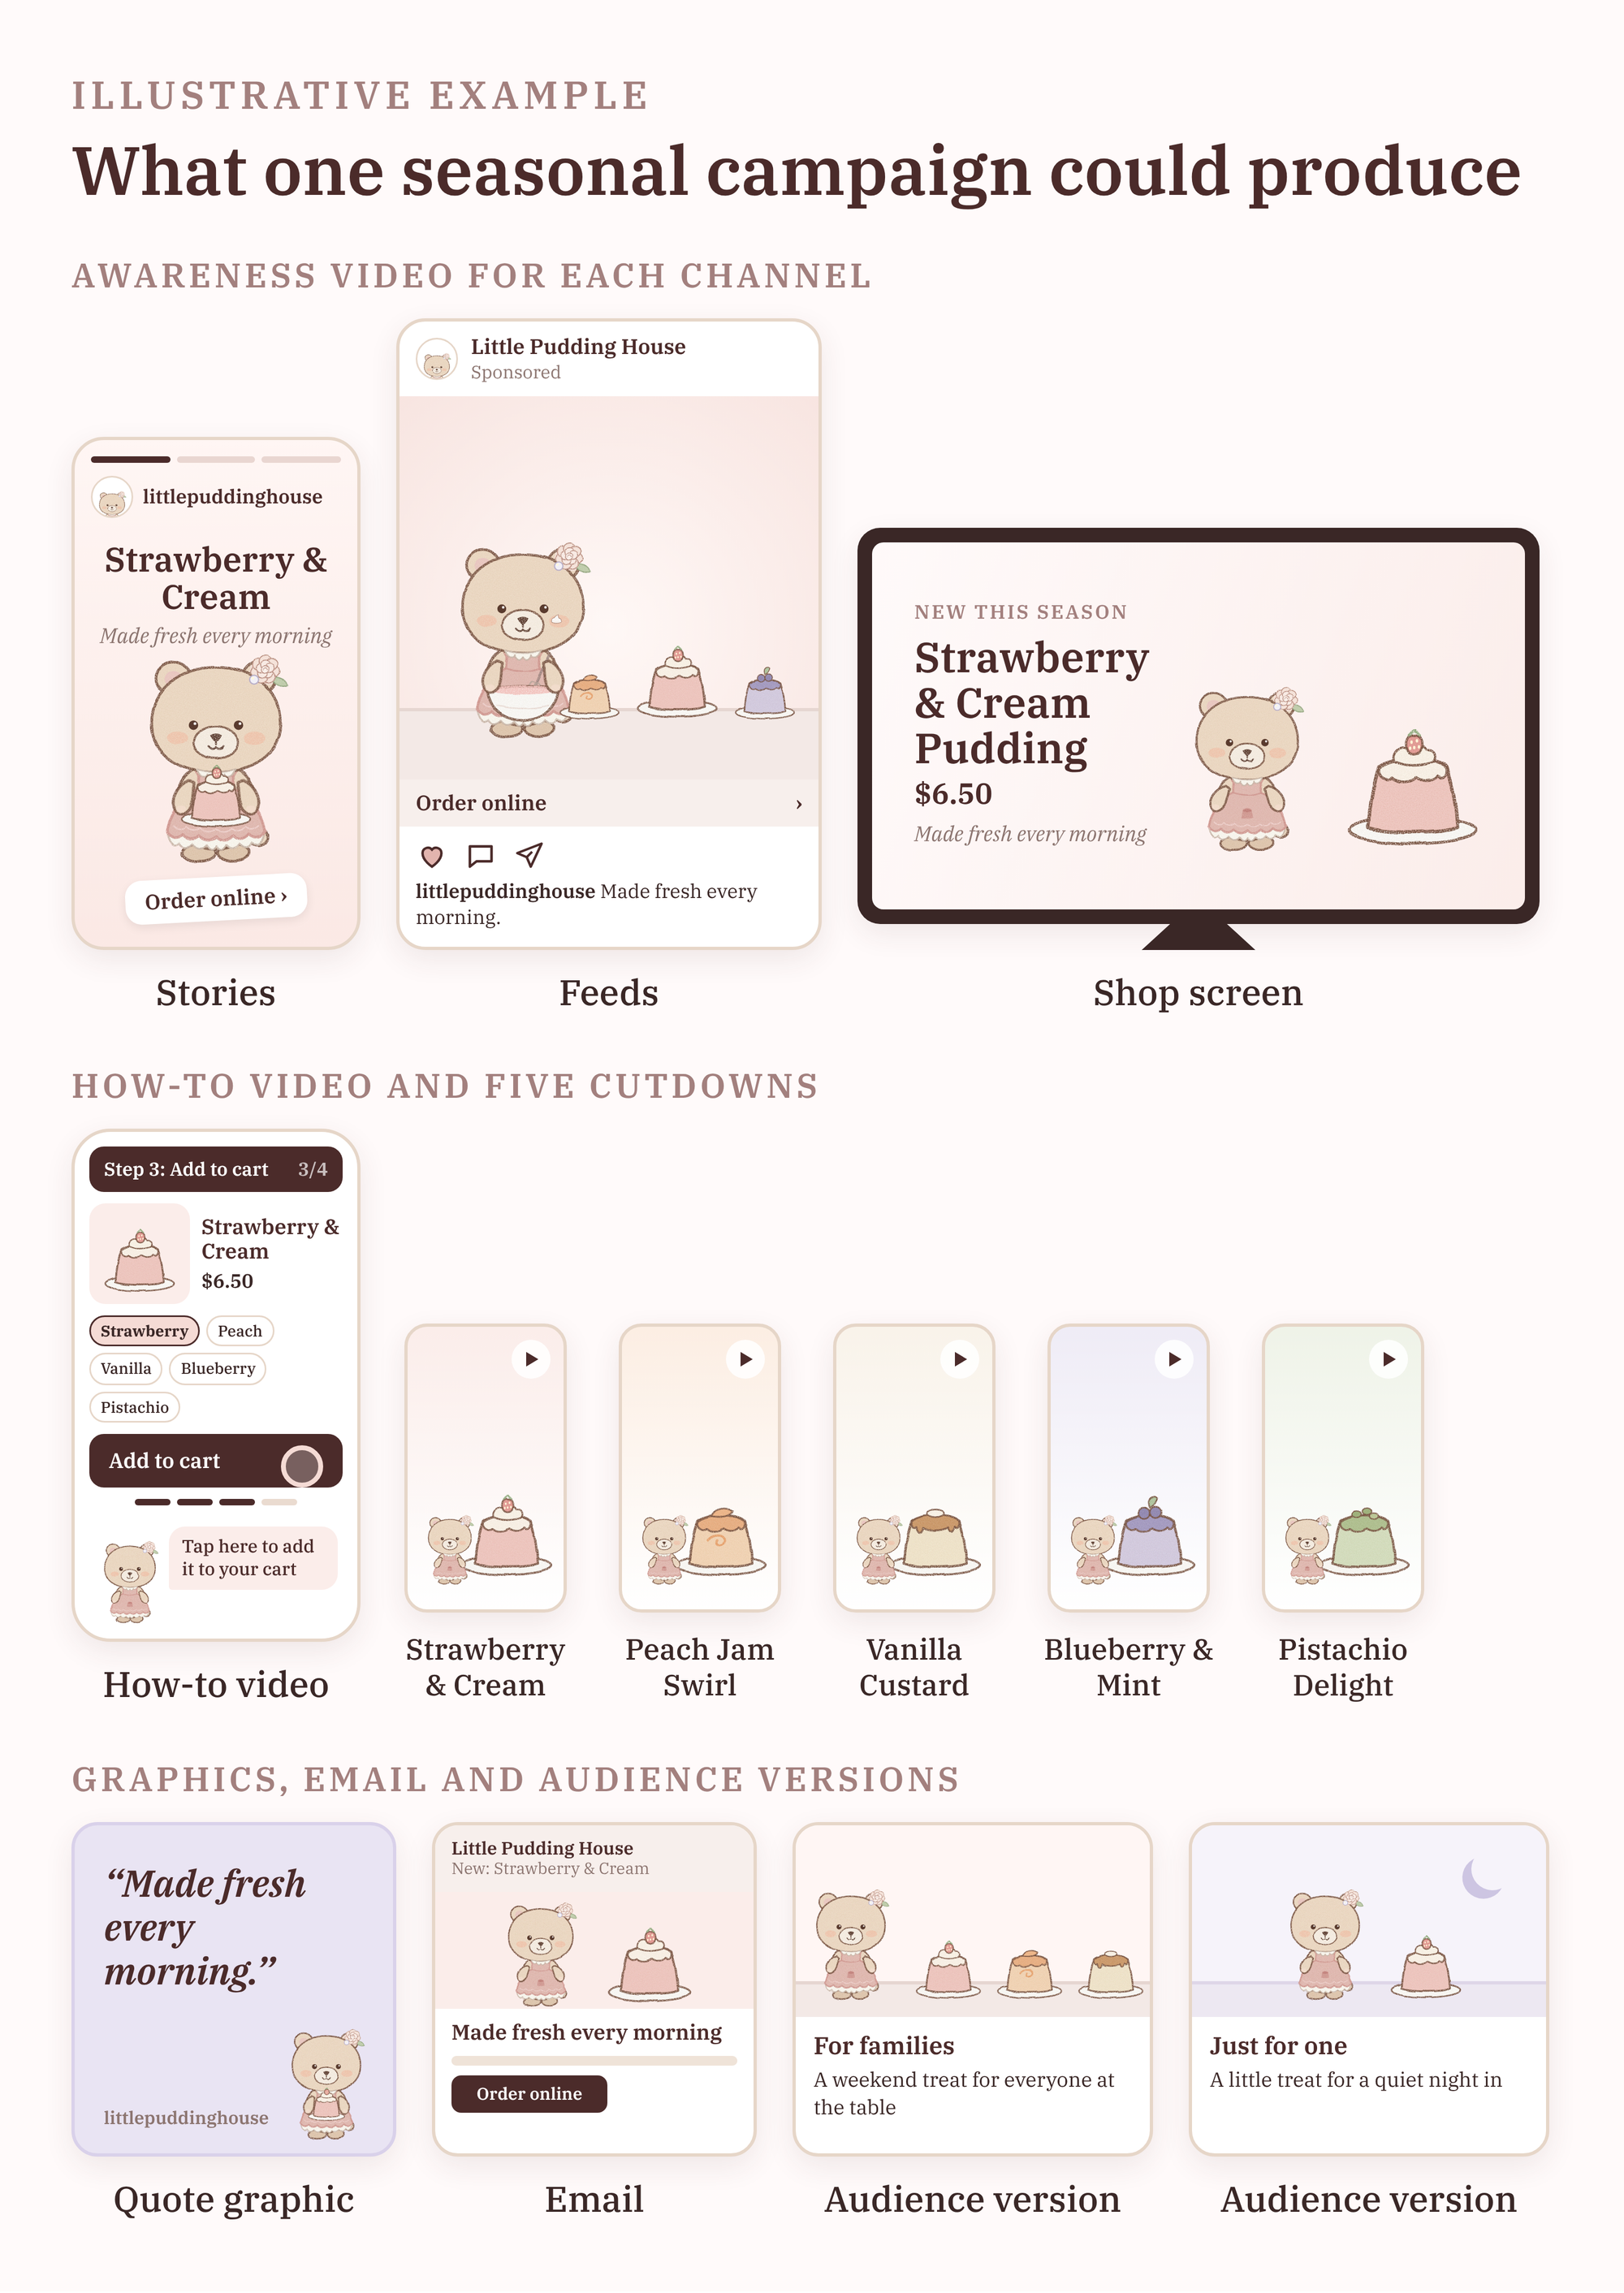
Here's what the setup could make for one Little Pudding House campaign. (This is an illustration, not a real campaign or a claim about results.)
The pillar piece is an article introducing the five seasonal puddings, and a three-minute film of the bear presenting them.
From those two pieces, the setup could produce everything below, from awareness videos to versions for two audiences.
Claude can help measure, trim and assemble videos, and I've found that the results are better when I provide raw footage and a template rather than starting from scratch.
It can also replace text or crop out unwanted elements. For example, if a header or footer stays in the same position throughout a recording, Claude can measure its dimensions and crop it out consistently.
Where this approach fits
This approach works best when a team produces a lot of repeatable content. SaaS (subscription software) businesses, for example, often need announcements, how-to guides and updates in several languages.
It may be less useful for one-off, highly creative campaigns. Even then, AI can probably help fact-check and adapt approved content for different channels!
Did the content work?
The right measure depends on the content's purpose. An awareness video should reach people and keep them watching to the end. A how-to video should lead to orders. Both sit below the product’s north star metric, the one number the whole company works to grow.
Lenny Rachitsky’s guide to choosing a north star metric helped me a lot here. It explains how that number depends on the business model and how people use the product, with examples from well-known companies.
Knowing which number matters also shapes the call to action I’d write, such as “Order online” rather than “Learn more”.
What comes next: AI agents
I use the setup in Part 2 today, and it waits for my response. Every render means staying nearby until it finishes before I can start the next one.
That waiting is why I started looking at agents, which can work from one step to the next without someone pressing go each time. They can also ensure the checks run every time.
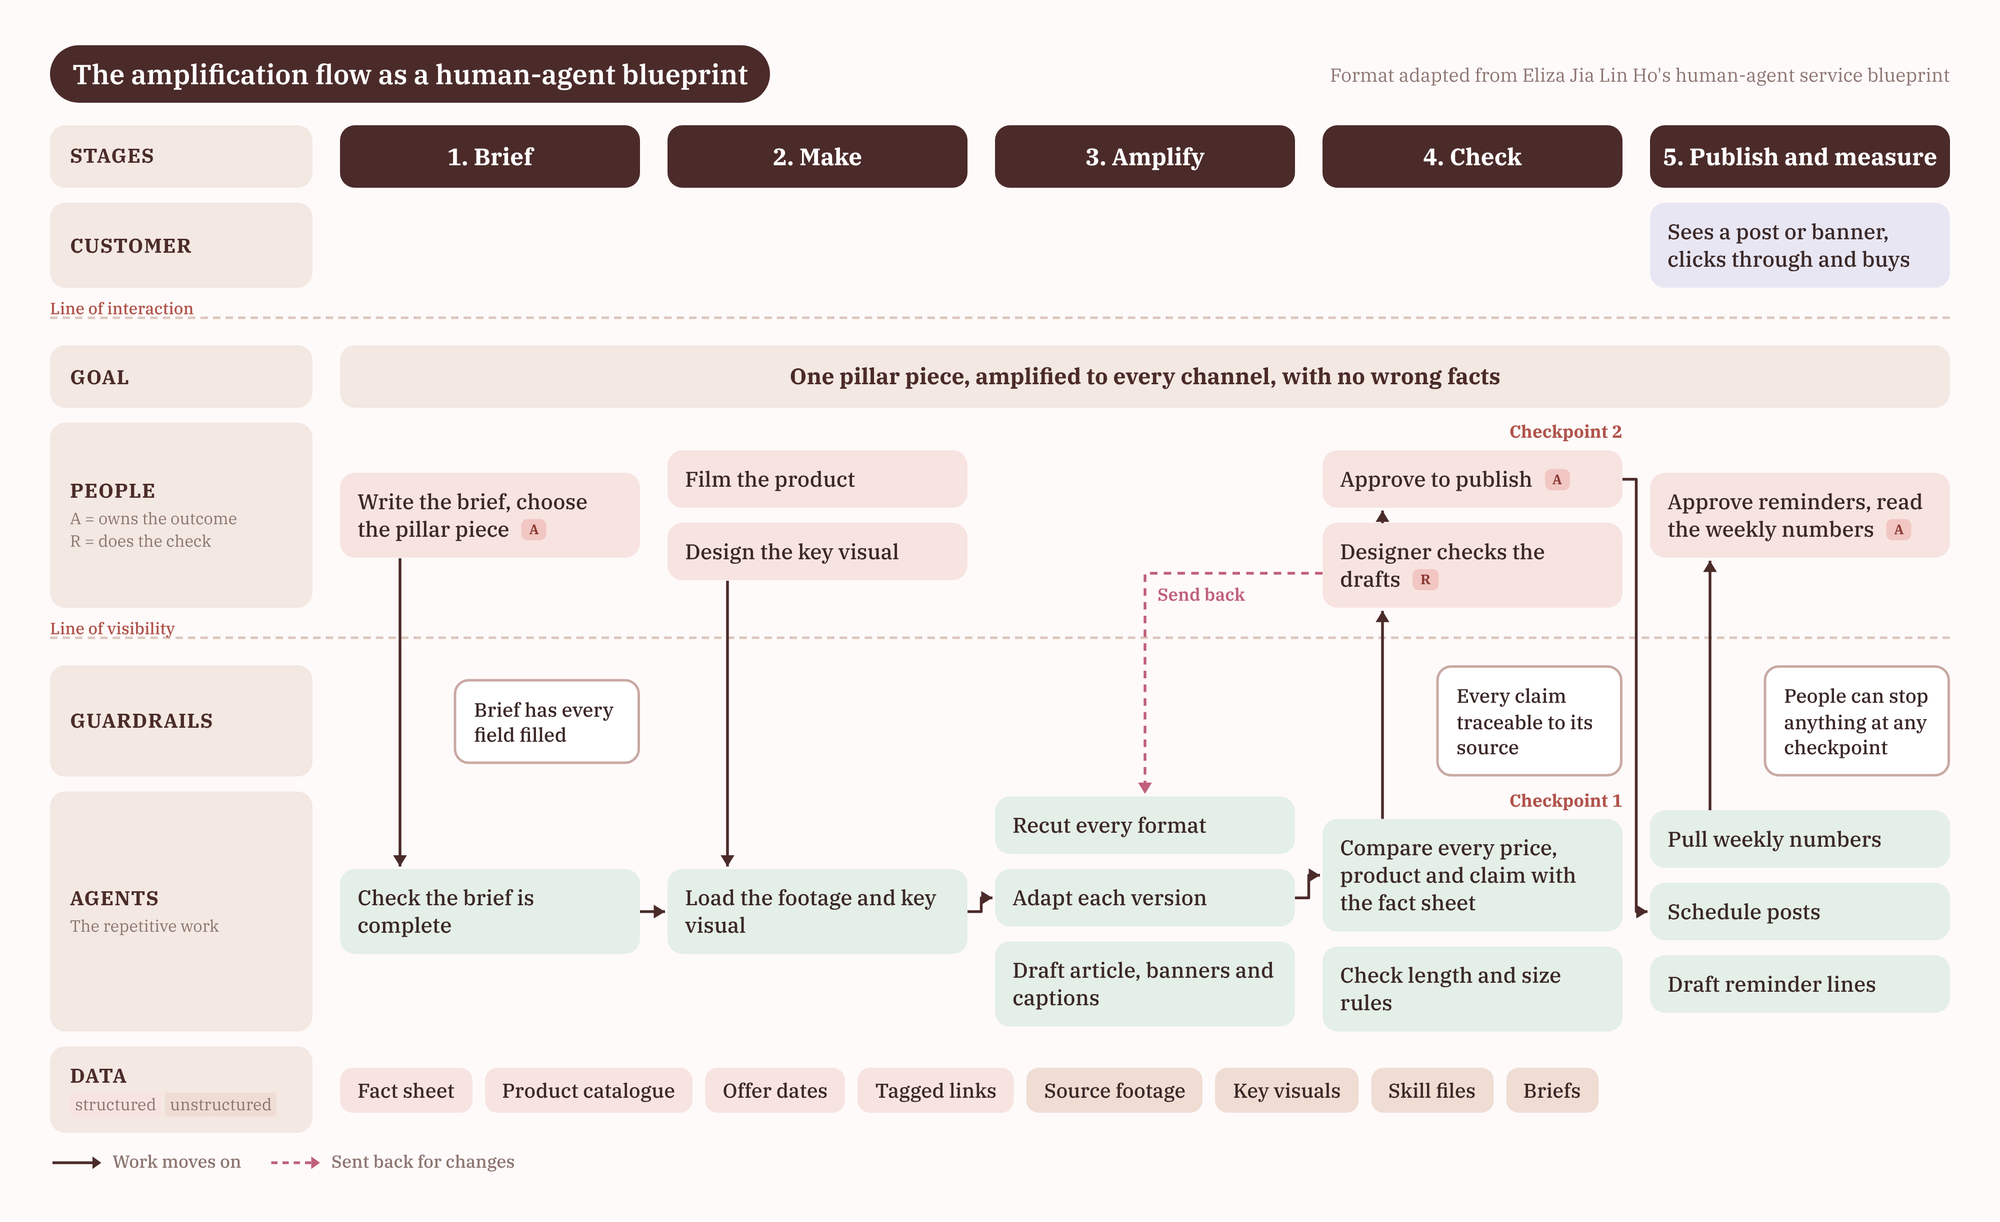
Anthropic has started rolling out a new beta version of Projects that works more like an agent. I haven't tried it yet! But here's my workflow made into a human-agent service blueprint, a format by Eliza Jia Lin Ho that shows, stage by stage, what people do, what agents do, and what data the agents use.
Keep growing!
Bonus content